
This Tutorial supposes you have a basic knowledge of PSP.
I used PSPX2 for this tutorial.
I will also be posting another tut of this for PSP7 users.
~Scott~
Ok... let's get crack-a-lackin'
Open a New Image:
Width 200 X Height 100 Pixels
Resolution 200 Pixels/inch
Raster Background
Color Transparent
Floodfill Raster 1 with color of choice. I used R255 G0 B255 (Magenta)
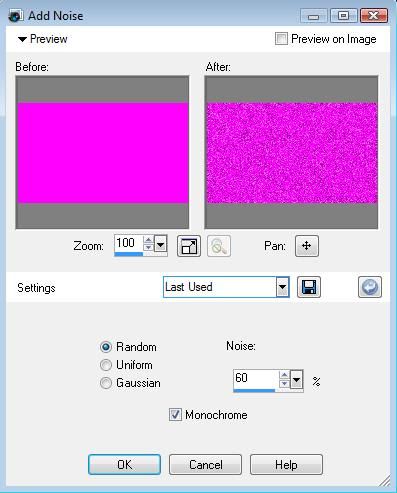
Click on Main Menu "Adjust" then click "Add/Remove Noise" Then Click "Add Noise"
Your settings should be as shown below
Right Click on Raster 1 Layer and select "Duplicate"
Click on Main Menu "Image" then select "Mirror"
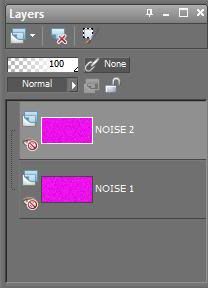
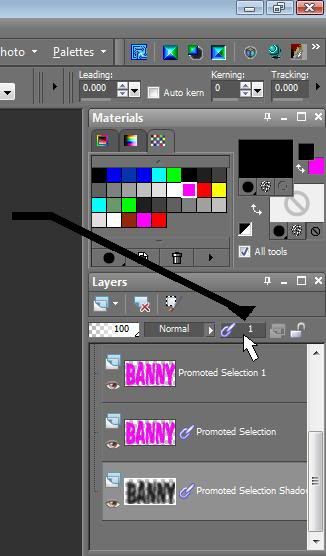
Now... in your Layers Palette, rename the layers as such
Raster 1 should be called "Noise 1"
Copy of Raster 1 should be called "Noise 2"
Now, hide both layers and Highlight the "Noise 2" Layer
Select your Font tool and choose a "WIDE BODIED" Font (I used "Market") and make your settings like mine.
Foreground Color: R0 G0 B0 (Black)
Background Color: NULL
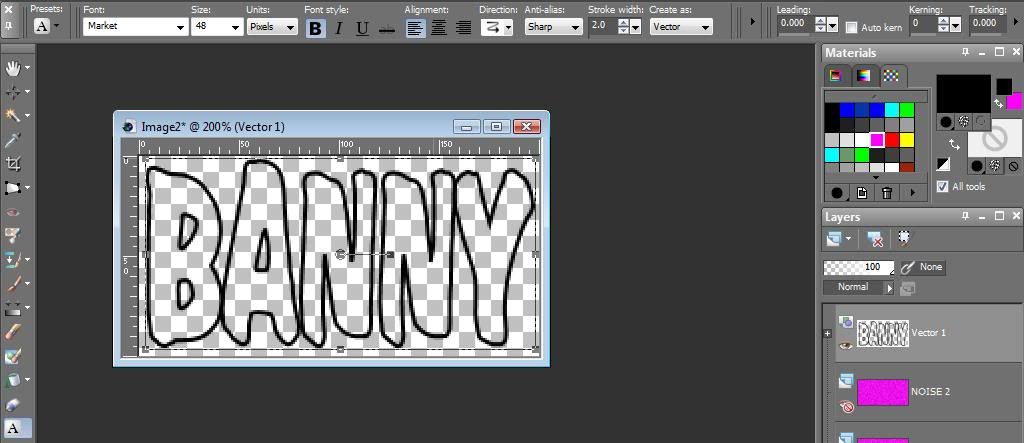
Grab the little boxes on the corners and drag your font to fill the box.
Now right click on the Layer "Vector 1" and click "Convert to Raster Layer"
Then rename that layer to be "Font"
Grab your "Magic Wand" tool and select inside each letter.
Mode: Add (Shift
Match Mode: None
Contiguous Checked
Feather: 0
Anti-alias Checked
Dropdown should be "Outside"
Click on Main Menu "Selections" then "Modify" then "Expand" set Number of pixels to "1" then click "OK"
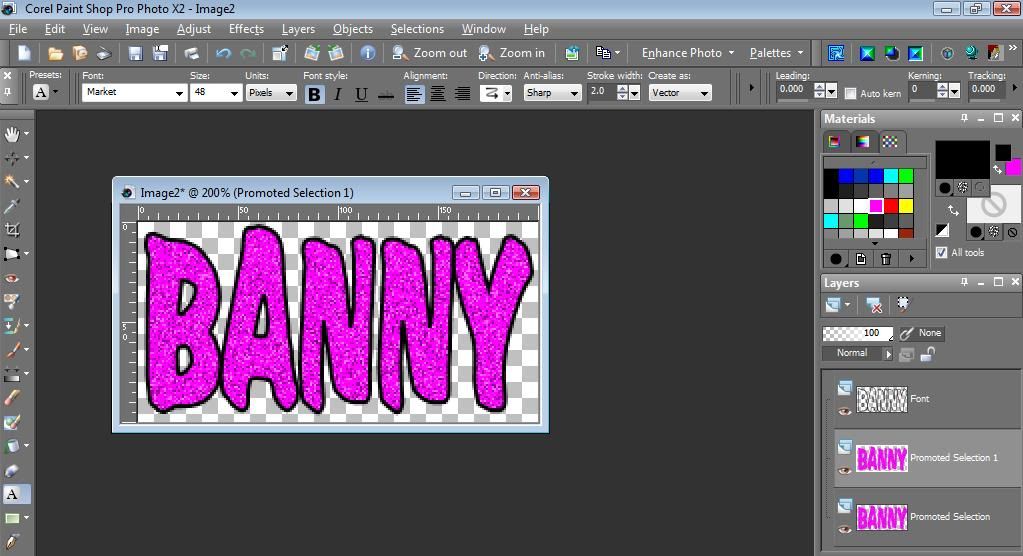
In the Layers Palette, righ click on each "NOISE" Layer and select "Promote Selection to Layer"
Now delete the original "Noise" Layers.
Click on Main Menu "Selections" then "Select None"
Your Image and layers should look like this below.
In the Layers Palette, Right Click on "Copy of Promoted Selection 1" Layer and select "Duplicate"
Click on Main Menu "Effects" then "3D Effects" then "Cutout".
Settings are:
Vertical:3
Horizontal:3
Opacity:65
Blur:4.00
Shadow Color: Black
Click "OK"
(You can omit this "Cutout" Step if you wish.)
in the Layers Palette, click once on the "Promoted Selection" Layer to highlight it.
(Should be bottom layer)
Click on Main Menu "Effects" then "3D Effects" then "Drop Shadow"
Settings are:
Vertical:4
Horizontal:4
Opacity:85
Blur:12.00
Shadow Color: Black
Check in "Shadow on new Layer"
Click "OK"
The Bottom layers will be "Linked".
You need to unlink them by clicking each layer and then the "UnLink" button.
If you created the "Cutout", right click on the "Font" Layer and click "Merge" then "Merge Down"
Now rename the promoted layers to:
Promoted Selection 1 to "NAME 2"
Promoted Selection to "NAME 1"
Hide the NAME 2" Layer ONLY and then Hold the "CTRL" & "Shift" keys together and then tap the "C"
Open Jasc Animation Shop 3
When it opens... Hold "CTRL" and Tap the "V"
Go back to PSP and unhide the "NAME 2" Layer and hide the "NAME 1" Layer
Hold "CTRL" & "SHIFT" keys and tap the "C" again
Go back to Animation Shop and hold "CTRL" & "SHIFT" keys and tap the "L"
In Animation Shop Click "Animation" then "Frame Properties" and make sure it has a 10 for the "Display Time"
Click "OK"
Now Click "View" then "View Animation"
Make sure it sparkles like you want.
If so it will look like this.

Click "File" then "Save As" and then save it with whatever name and in whatever place for your convenience.
Please leave a comment if you try this as it is my first tutorial to share. Hopefully you will enjoy it and it can work for you.
ReplyDeleteScott